If you have an existing Ecwid account and would like to migrate your store data to Netcash Shop, you can do so by following the guide below.
Note: When migrating to Netcash Shop, you will need to close any payment provider or gateway accounts, as the Netcash eCommerce Payment Gateway is already built-in to Netcash Shop. No other gateways need to be used, as all payment methods are included with Netcash.
Step 1: Making plans to migrate
To migrate successfully between Ecwid and Netcash Shop, both accounts need to be on a paid plan.
1. Sign up for Netcash Shop and complete the registration process to upgrade to your chosen plan and activate your Netcash eCommerce Payment Gateway.
2. Sign in to your new Netcash Shop, and delete the example products from the catalogue by going to Catalog > Products and selecting All from the dropdown menu:

3. Then select Mass update > Delete to delete all of the products.

4. Export your product, order, and customer data from your Ecwid store before initiating the migration process. You can do this by following the same process as in step 2, in the Products, Orders, and Customers menus in your Ecwid store and selecting Export all instead of Delete.

Note: Order data can not be imported to your Netcash Shop, but it is important to export it from Ecwid for record keeping purposes.
Step 2: Requesting migration from Ecwid
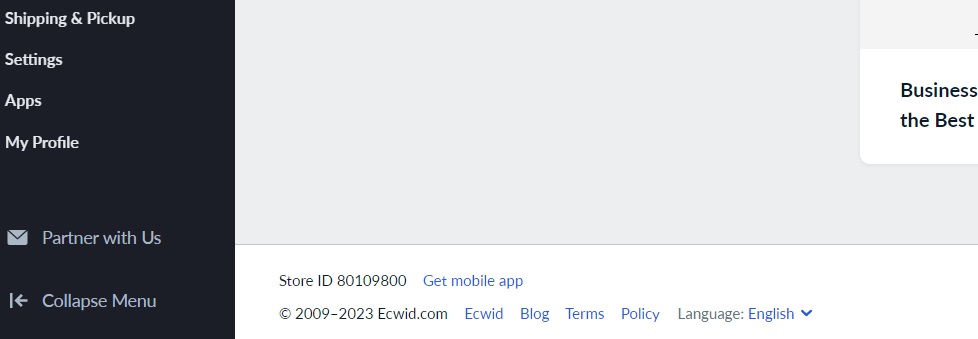
To start the migration of your store data, you need to contact Ecwid Support. Specify your request to migrate your Ecwid store data from your Ecwid store ID to your new Netcash Shop store ID. You can find both of these ID numbers at the bottom of your dashboard:

Ecwid will receive your request, and return a support ticket number as your reference for the task. They usually respond in 24 hours, or within the next 1-2 business days to accommodate for time zone differences and weekends.
Ecwid will be able to migrate:
- Your product data including categories
- Your store settings
- Some payment and shipping method settings
Once Ecwid has completed the migration, it can take up to 24 hours for the data to reflect in your Netcash Shop.
Step 3: Setting up your website
You can still set up your website with Netcash Shop’s Instant Site while you wait for the migration to be complete. If you were using Ecwid’s website builder for your site design, this will be fairly simple to replicate in Netcash Shop.
If you’re using another platform for your website, such as WordPress, Wix, or Squarespace, you can still make changes there but will need to wait until the migration is complete before adding Netcash Shop’s store functionality to your site.
Step 4: Importing customer data
Once the migration is complete, you can now import your customer data. You can do this by following similar steps as you did for the export process.
- To import customer data, use the free Import Customers app from the Netcash Shop App Market.
- Simply install the app, and download the template of the CSV import file to be used.
- Add your exported customer data to the template columns, or edit your existing customer data CSV file to match the template headings and so forth.
- The password column can be left empty as a new random password will be created for each customer to login with.
- Upload the file to the app and it will automatically create new customers in your Netcash Shop under My Sales > Customers.
Step 5: Install your apps
Any apps that you had used in your Ecwid store will likely need to be re-installed in your Netcash Shop. To install your apps:
- Go to the Netcash Shop App Market and search for the apps you want to install
- Install each of them separately.
- Complete any sign-in details or account information needed to set up each app once more.
Migrating from Ecwid to Netcash Shop can be a simple process for small and large businesses alike. For more complex needs, we recommend contacting us about our Netcash Shop Partners, or alternatively using your own developer to facilitate the process.